How to make a front support dog wheelchair? Our furry friends are an integral part of our lives. Dogs bring so much joy to our lives. Playing ball in the yard with them or taking a walk with them is a great way for us to enjoy the afternoon.
Pets are just like humans, they get less mobile with age. Your dog may lose its ability to walk properly as it gets older. Dogs with poor hips and lower backs could quickly become disabled.
It can be heartbreaking to see your dog struggling with standing or walking. A dog wheelchair can help relieve some of the discomforts and pain your dog feels while they are walking.
You can buy prefabricated pet wheelchairs online. But, why spend the extra money to build one yourself? You can either buy your dog a pre-built model or make one yourself at home.
Your doggie only cares about walking beside you. Your pet’s quality of life will be improved by the DIY dog wheelchair. Your pet may take some time to get used to the wheelchair. After a few days, they will be able to get used to the wheelchair and walk with you around the block.
Instruction How To Make a Front Support Dog Wheelchair Step By Step
Step 1: Measure your dog’s chest
Measure the circumference of your dog’s chest. Next, measure their rib cage length. These measurements will enable you to create the frame’s basic design.

Next, measure the width of your dog’s chest nubs. This will enable you to decide the size of cutouts that allow your dog’s nubs to pass through.
Step 2: Measure your dog’s height
Stand your dog straight up to get the correct height. Your dog’s height should be measured from the top of its legs. This measurement will impact how your wheelchair’s fork is designed. Stability will be provided by the fork.
Step 3: Make sure you have all the right parts
You can find everything you need online from a variety of sources. Before you start this project, make sure you have all the necessary parts.
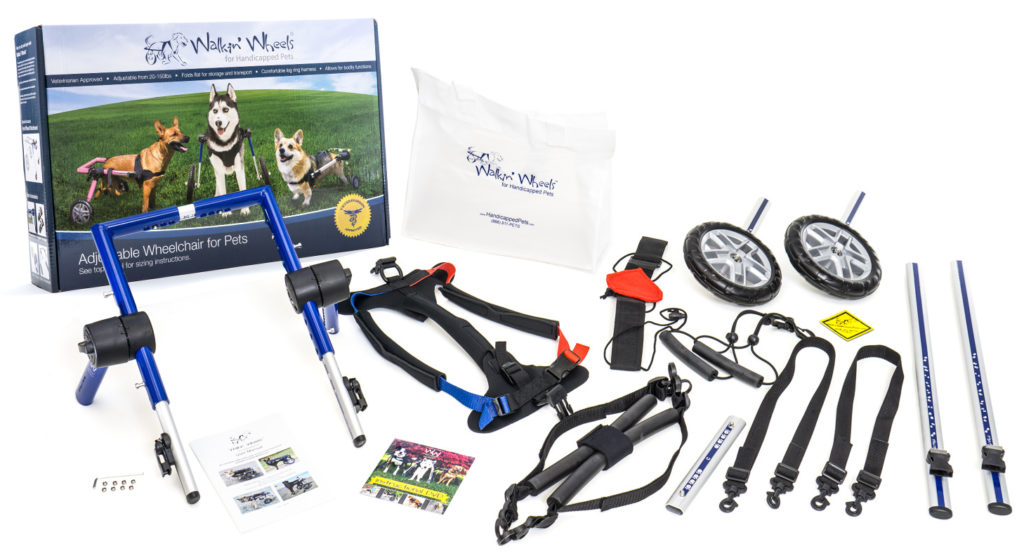
The majority of front support petwheelchairs recipes will use one or more of the following parts:
- Aluminum tube cut to your dog’s dimensions
- Six bike flashlight mounts
- Sponge tube
- Screws
- Drilling with an electric motor
- Two dog wheels
- Cap for AL tube plastic
- Velcro
Step 4: Make sure the tube is cut according to your dog’s dimensions
Once you have determined the measurements of your dog’s body, the aluminum tube can be cut to fit them. You have two options: either buy the tube from a professional or cut it yourself.
Step 5: Make holes in the tube
Once you have bent the tubs, drill holes through them to allow the parts of your wheelchair to fit together. The video will further explain this process.
Step 6: Assemble your wheelchair
To assemble the wheelchair, you can put the screws in the flashlight bicycle mount. You will receive a piece of rubber with the mount. This rubber can be used for friction. This will make it more rigid. The stronger your wheelchair will be, the more flashlight mounts you use.
Step 7: Make the adjustable front handle
For the front handle, drill holes in the tube. These holes will allow you to adjust the tube to your dog’s length. Use some plastic to cover the aluminum tube.
Step 8: Finish the chair
Next, attach Velcro to the sponge tube. It should be placed at the back of your wheelchair. This will allow your dog’s hind feet to fit inside. You can adjust the tube until your dog feels completely comfortable. Give the wheelchair a chance to prove its worth. The wheelchair should be able to stand up well.
Designs and Building Plans for the Best DIY Dog Wheelchair
We searched the web for plans to make the best DIY doggie chairs. We tried to find a model that would fit all dogs in our top five choices. There are options for wheelchairs that will suit any size dog, no matter what breed it is.
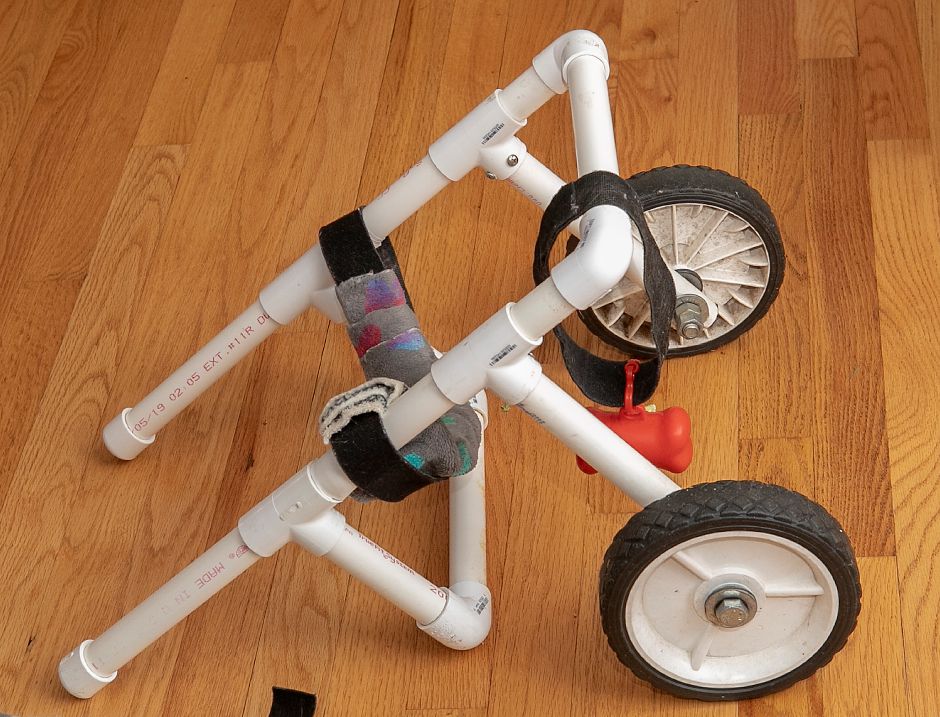
You can be creative when designing your dog wheelchair. DIY projects are fun because you can customize your design to meet the needs of your dog. You have the option to experiment with different fabrics and wheels for your sling. You can modify your design as many times as you like.
1. The Most Affordable DIY Dog Wheelchair
This example was found on Reddit. This wheelchair is ideal for medium-sized dogs. It also has the lowest price of the five models in this review. This wheelchair can be assembled in a matter of minutes and Fido can go for a walk in it before the end.
Take your measurements and cut two lengths of PVC pipe vertically for the wheel forks. Attach the wheels to the PVC at the bottom and use the threaded nuts and bar nuts as shown. The frame can be constructed using piping. Use the elbows to form the handle and frame, and the tee connectors for the wheel forks.
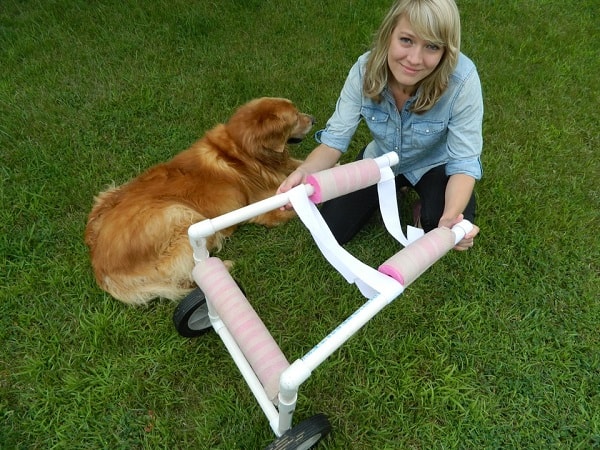
It is not necessary to glue everything together. Attach the nylon web sling and lock it in place.
The Tools You Will Need:
- Hacksaw or PVC pipe cutter
- Pair of scissors
- Measure tape
Materials Required:
- PVC Piping
- 4 x PVC elbow joints and tees
- PVC glue (optional)
- 2 x Rollerblade tires
- To build axles, use threaded bars
- Material for the sling: We recommend nylon webbing as our top choice
2. PVC DIY Dog Wheelchair
Begin by building the top frame using a PVC pipe. Next, use the tee connectors and create a U-shaped top frame with the tubing.
The pipe’s front end should be covered with trees. Slip a material between the pipes’ ends. Make a harness that covers your dog’s chest and shoulders. As shown in the above image, cut the pool noodles and place them as padding for the harness.
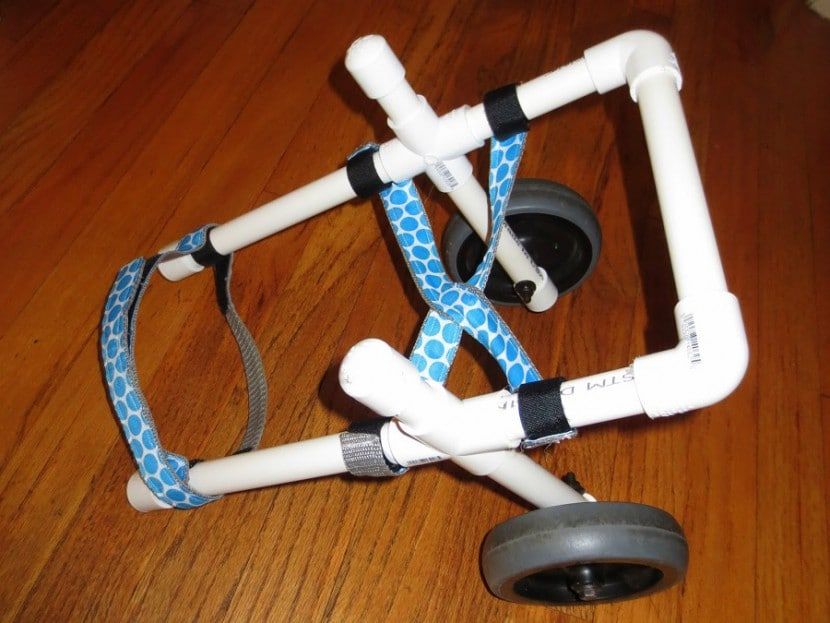
To form the rear frame of the wheels, use elbow tees. Attach the wheels to the base by drilling holes at the elbows. Attach the rear wheels to the axle using a wider rear axle made of PVC with more elbow tees.
You can finish the rear sling by pulling fabric through the tee connectors the same way you did the front harness.
The Tools You Will Need:
- Hacksaw or PVC pipe cutter
- Cordless power drill
- Measure tape
- Needles and thread for sewing (preferably nylon to increase strength).
- Scissors
- Pen
- Mallet or soft-head hammer
Materials Required:
- PVC Pipes 10ft
- 4 x PVC elbow joints
- 2 x PVC Tee Connections
- 2 x Furniture casters/Dolly Wheels
- 2 x Clip
- PVC epoxy glue
- 1 x foam pool noodles
- Ace bandages
3. Aluminum DIY Wheelchair for Dogs
We recommend aluminum tubing to make your dog’s wheelchair frame durable for larger breeds. Tubing is a complex material that requires special bending equipment. You will need to hire a contractor or a metalworker to bend the tubing.
You must be exact in your measurements. If you are not exact, the metalworker will bend the tubing. This design comes from DoggyWheels, and it’s an example of a high-quality best dog wheelchair that’s effective, lightweight, and durable.
One word of caution: When you log onto this site, you will see a photo of the dog’s owner after she was put down by the vet. Although it’s not an unusual photo, you might be surprised by the surprise. It is a reminder of the seriousness of dog immobility and the consequences of not creating a wheelchair so your furry friend can enjoy their final days.
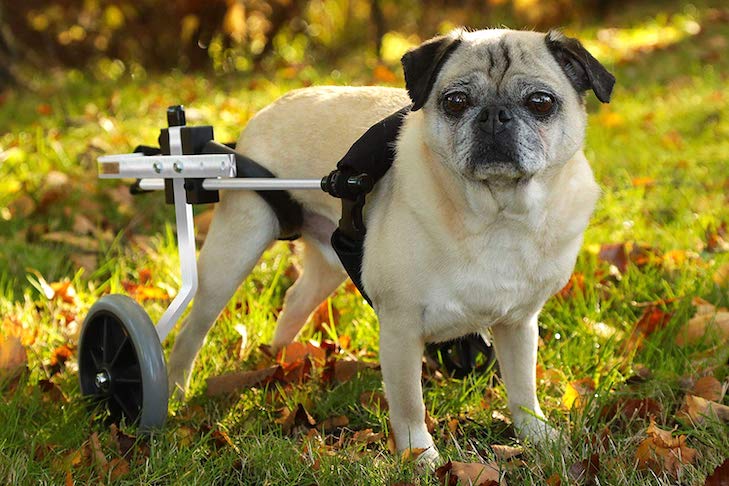
This chair is fairly easy to assemble. The most difficult part is bending the tubing. The rest of the assembly will be relatively simple once that is done.
This chair has a sling that connects to the top and rear of the frame. The support bars at the bottom and top provide sturdy support for large, heavy dogs. This pet wheelchair design uses pram wheels because they offer plenty of mobility and won’t get stuck on uneven ground or rocks.
The metal design can cause damage to furniture in your home. Dogs don’t know how to draw large turning circles and they may bump into furniture as they learn to manage the chair. To protect your furniture and home, we recommend that you place foam tubing around the corners of the frame.
The Tools You Will Need:
- Hacksaw blades made of metal
- Mallet
- Sharpie
- Measure tape
- Nylon thread and needle
- Steel tubing
Materials Required:
- Aluminum tubing 2 x 48 inches in length or CR steel tubing
- 2x Large pram wheels
- 2 x Threaded axles
- Adhesive for metal bonding
- Threaded lock bolts & nuts
- Snap-hook
- Insulation for piping
- Denim for the sling
- Velcro straps
- If necessary, fill the frame with sand
- Nylon thread
4. 3D printed DIY Dog Wheelchair
Although this tiny puppy lost his front legs at birth he looks so cute in this quad-wheeled canine wheelchair. 3D-printers can be amazing technology. You can print everything you need, including facemasks and wheelchairs.
These wheelchair plans can be found at Makezine.com. These plans can be downloaded from the site and used in your 3D printing application. These plans offer a new take on wheelchair materials by replacing the PVC pipe with acrylic tubing.
Ask your friends and family to lend a hand if they have a 3D printer. If you’re lucky enough to be able to convince them, there are many 3D printing companies that may be willing and able help you print your doggie’s chair for free.
Although we couldn’t find instructions for assembly with these plans, we believe it is a simple process. Printing the chair is the hard part. This design works best for small dogs. However, it can be scaled up and used for larger breeds. It might cost more to have a larger chair printed by someone else.
Tools You’ll Need:
- 3D Printer
- Hacksaw
- Measure tape
- Pen
Materials Required:
- Acrylic tube
- Rollerblade or skateboard wheels
- Plastic connectors to the straps
How do I Get my Dog to Use a Front Support Wheelchair?
Many owners worry about whether their dogs can be made to feel completely comfortable in a wheelchair. As it turns out there’s no reason to worry. Your dog will want to run, play, and frolic. They will soon discover that they can do all of this in a wheelchair.
You will want to make sure the chair is just right for your dog’s needs. Watch your dog’s reaction to the chair once they are seated. It is important to ensure that your dog can comfortably sit in the chair and move its legs without any restrictions. They will be fine as long as they can do this.
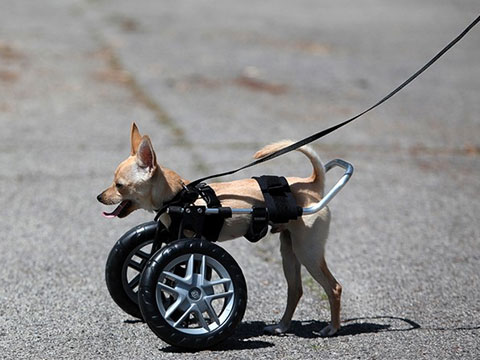
Allow your dog to take some time to get used to the chair. It will take some practice to get used it. It will take time to learn how to steer and stop in the right spot. These simple tasks can be taught to your dog if they are patient enough.
Your dog may not realize it can run again for a while. Your dog needs encouragement to get going. You can reward them with lots of treats, hugs, and pet smears.
Mobility Issues For Dogs
A DIY dog wheelchair may be necessary for your pet for a variety of reasons. You never know when your pet may require this valuable piece of equipment, from old age to accidents.
You may need to buy or make a wheelchair in order for your dog to be able to walk.
1. Arthritis
Living with advanced arthritis is a common problem for both humans and dogs. It can cause pain every day. It may not be enough to put pressure on your dog’s affected limbs by putting too much weight on him.
Your dog may have limited mobility. Fortunately, a DIY dog wheelchair can make a big difference. It can dramatically improve their quality of life.
2. Amputations
Although we hate to think about our pets suffering from serious injuries or amputations, a wheelchair is an ideal companion that will allow your pet to regain his independence.

Many dogs that have experienced depression after surgery have reverted to their happy, healthy selves when they are able to use a wheelchair.
3. Recovery/Rest Post Surgery
This is one of the best uses for a DIY dog chair. There are many reasons canines may need surgery. These can range from routine procedures to life-saving procedures. It can be difficult to rest a dog after surgery, especially if they are more active. A wheelchair can be a helpful tool for rehabilitation and speeding up recovery.
4. Neurological Issues
A wheelchair can often assist with dog’s mobility issues that affect your dog’s ability. Legs may require stirrups depending on the severity of the condition. If the condition is milder and your vet recommends strengthening the legs, the chair can also be lowered to allow the legs to reach the ground from a lower position.
Teach Your Dog How to Use His Wheelchair
Many owners buy or build a wheelchair for their dog, then strap it in and watch as the dog refuses to move.
It is frustrating. However, there are some things you can do to make your dog feel at ease in the new chair.
Put Your Dog in a Wheelchair
Be sure to calmly introduce your dog to it. Simply bring the wheelchair into your room and place it in the middle. Take the wheelchair into your dog’s room and let it look around. If he needs encouragement, he can sit beside it.
After your dog is satisfied with the chair and has lost interest, you can pick him up and place him in it. Slowly and make sure your dog is comfortable. Relax your posture and lean back a little. He will take many cues from this. Allow him to adjust to the chair for several minutes before moving on to the next step.

If your dog starts to complain or is unable to get away, you should not remove him. Double-check to ensure that he is not suffering from discomfort. But, be strong and keep him in place. You’re teaching him to complain if he complains.
He may be quiet for a few minutes, but eventually, he will relax and accept his new ride.
Getting Your Dog to Use The Wheelchair
Even if your dog is content to sit in the chair, it’s possible that he doesn’t know how to move around.
It’s easiest to simply get up and move into another room. Chances are your dog will follow you with his front legs. Once the wheels carry his back, he will be able to use the chair easily.
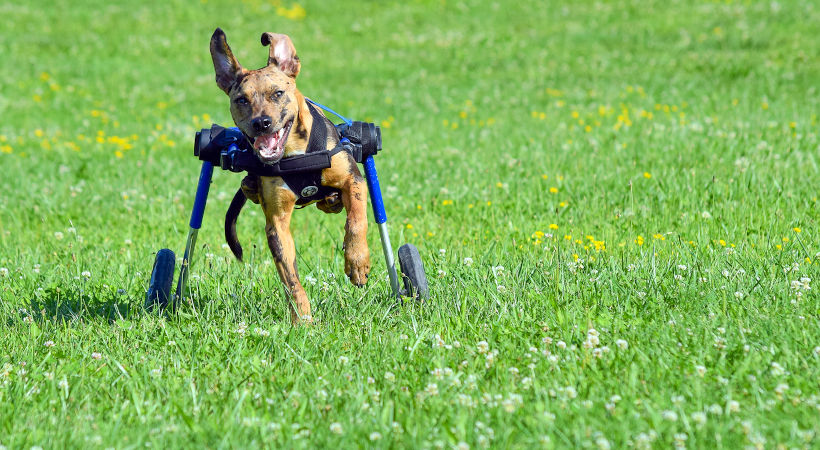
Some dogs will not move. Some dogs will just stay stubbornly put up their feet. You can bribe them to move if you have a tasty treat. A string can be tied to the chair’s front and pulled him forward by you. He will soon be able to walk with his front legs. This will aid him in understanding the process.
Keep trying until your dog is willing to use the chair.
Can a Dog Poop and Pee in a Front Support Wheelchair?
You may be concerned about your dog’s ability to safely remove pee and poop. The dog wheelchair allows them to eliminate pee and poop safely and comfortably. This should not be a problem.
It is simple and clever. You will not have to get your dog up in a normal way. Instead, they will spread their hind legs. The urine and feces they have gotten will then fall to the ground. It will then completely ignore the support frame of the wheelchair.
The poop bag will still be required to clean up any mess. You won’t have the burden of wiping down the back of the chair each time your dog goes to the bathroom. This is a safe and convenient solution to the age-old problem that dog owners have with cleaning up after them. It doesn’t matter if they are in a wheelchair.
Final Thoughts
It can be quick and easy to decide on the right type of chair for your dog, measure him and build his wheelchair.
You can help your dog get around a bit more easily by taking half the day to build him a homemade wheelchair. Do your part to make someone’s life easier if you know of someone who has a dog in need.
Many times I’ve seen paralyzed dog owners trying to make their dogs happy despite having limited resources. Many of these people had never heard of a wheelchair for dogs. Spread the word and let’s all allow dogs to have mobility regardless of their physical limitations.
F.A.Q.
Are dog wheelchairs cruel?
Dog wheelchairs aren’t cruel. A dog wheelchair can prolong your dog’s functional life if it is chosen carefully and accompanied by your veterinarian. Pet wheelchairs may be necessary for small injuries or surgeries.
Can dogs poop in wheelchair?
Dogs can to pee or poop when they are using a wheelchair. Dog wheelchairs were designed to help dogs relieve themselves. Dogs with paralysis and those with weak limbs have difficulty standing and walking on their own.
